Prioritize legibility above all else. A food-related visual identity should be instantly recognizable, even at small sizes, on packaging, and across various marketing materials. Consider using robust, sans-serif fonts for clarity. Example: Montserrat offers a clean, accessible appearance.
Leverage color psychology. Warm hues like reds, oranges, and yellows stimulate appetite and convey energy. Cool colors such as blues and greens can represent freshness and health, particularly effective for vegan or organic brands. For instance, consider pairing a burnt orange with a deep brown to evoke a sense of warmth and tradition.
Incorporate subtle food-related imagery or symbolism. Avoid literal representations of specific dishes. Instead, explore abstract forms that suggest ingredients, cooking processes, or the overall culinary experience. A stylized flame could represent passion for cooking, while interlocking geometric shapes might allude to the collaborative nature of a kitchen.
Always test your visual identity across different platforms. Ensure that the color palette translates accurately across print and monitors. Verify that the graphic scales well without losing detail or legibility. Create mockups of your mark on packaging, signage, and social media profiles to evaluate its performance in real-world scenarios.
Strive for memorability through simplicity. Reduce the visual elements to their most fundamental forms. Examine the visual identities of successful food companies; they almost always use clear shapes. Using a single, dominant color and a distinctive geometric form, for instance, can strengthen recall by approximately 30% based on research by the University of Ohio.
Choosing the Right Culinary Visuals
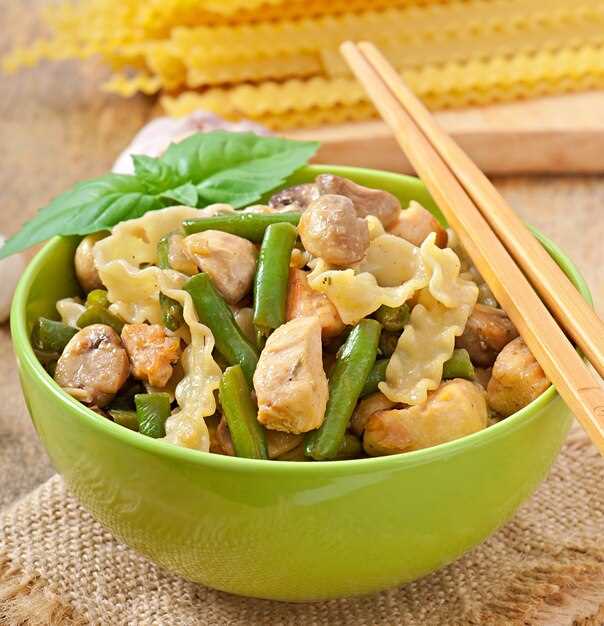
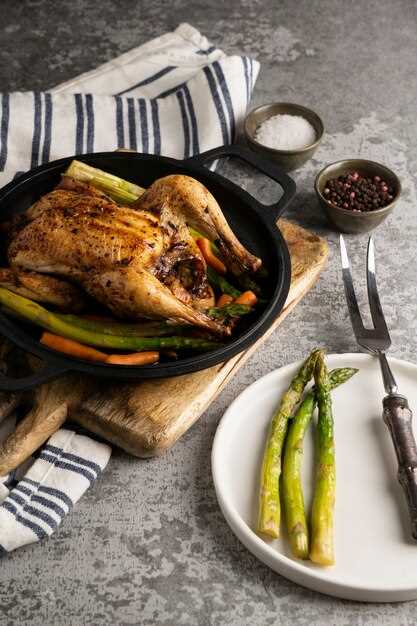
Select visuals that showcase the final dish, not raw ingredients. This instantly communicates the culinary creation’s result. Employ high-resolution photography; blurred or pixelated graphics detract from appeal and professionalism. Consider showcasing a serving suggestion, complete with complementary side dishes and garnishes.
Color Palette & Composition
Opt for color schemes that evoke appetite. Warm hues like reds, oranges, and yellows are often associated with food, but consider cooler shades for specific cuisine types (e.g., blues and greens for seafood). Employ the rule of thirds in your visual arrangements to create balanced and visually appealing compositions. Ensure adequate lighting that displays food texture and color realistically. Avoid harsh shadows or overexposure.
Visual Style & Culinary Identity
Match the visual style to the cuisine’s character. Rustic, hand-drawn graphics might suit artisanal baked goods, while sleek, modern imagery better represents contemporary gastronomy. Think about incorporating utensils and serving ware that resonate with the meal’s theme. The objective is to create a visual articulation of the brand’s culinary ethos.
Pro Tip: A/B test different visual options with your target demographic to identify the most engaging and effective representation of your food offerings. Focus groups provide valuable feedback on visual perception and appeal.
Color Palettes That Stimulate Appetite
Employ warm hues like reds, oranges, and yellows to instantly trigger hunger. Red is assertive and attention-grabbing, orange evokes joy and energy, while yellow is associated with happiness and optimism.
Strategic Color Combinations
Combine red (#FF4136) with a muted green (#8BC34A) to balance boldness with freshness, ideal for product branding promoting natural ingredients. Another palette could feature a warm yellow (#FFDA63) alongside a deep brown (#795548) for a comforting and grounding sensation, perfect for culinary institutions. Use an analogous palette of orange (#FF851B), yellow-orange (#FFAB40), and yellow (#FFD700) to craft a cohesive and appetizing visual identity.
Leveraging Color Psychology
Consider incorporating accent colors strategically. A touch of deep blue (#0074D9) can create contrast and a sense of trustworthiness. However, use blue sparingly, as it’s generally considered an appetite suppressant. Light greens and creams suggest freshness and health, suitable for eateries highlighting organic offerings. Conversely, using too many pastel tones might create a sterile, unappetizing impression. Test palettes with target demographics to gauge real-world reactions.
Typography That Enhances Readability
Prioritize fonts with generous x-height and open apertures (like those found in letters ‘a’, ‘e’, ‘g’). This significantly improves legibility, especially in smaller sizes typical for ingredient lists or instructions.
Selecting the Right Font Pair
Combine a clear, readable sans-serif for headings with a serif face optimized for body text. A good pairing example: Open Sans (heading) and Lora (body). Ensure sufficient contrast in weight and style between the two; avoid overly decorative fonts for either.
Optimizing for Various Formats
Adjust font size based on the medium. Printed materials typically require smaller sizes than screen displays. On screens, test your layout on different devices (phones, tablets, desktops) to confirm readability across platforms. Consider using relative units like ’em’ or ‘rem’ for font sizes to enable scaling.
| Aspect | Recommendation |
|---|---|
| Font Size (Body) | Minimum 16px for screen; 10pt for print (adjust based on chosen typeface) |
| Line Height | 1.4 – 1.6 times the font size |
| Letter Spacing | Slightly increased letter spacing (+0.05em) can improve readability, particularly with condensed fonts. |
| Contrast | High contrast between text color and background is paramount. Black text on white background is generally safest. |
Illustrations: Go Bold or Keep It Minimal?
Choose illustration style based on brand personality. A playful, family-oriented food brand benefits from bold, colorful drawings. For upscale culinary establishments, opt for minimalist line art or a subtle watercolor effect.
Bold Approach: Advantages and When to Use It
High impact, immediately communicates product essence. Best for targeting children, conveying fun or illustrating complex cooking processes clearly. Use vibrant palettes and thick outlines to attract attention, especially on product packaging.
Minimalist Approach: Advantages and When to Use It
Projects sophistication, timelessness, and emphasizes product quality. Ideal for artisanal food brands, restaurants with a modern aesthetic, or conveying a sense of health and wellness. Employ single-color drawings, delicate line work, or negative space to create an elegant impression.
Consider your target demographic. Younger audiences generally respond well to bold illustrations, while older demographics might prefer a more understated approach.
Testing Your Emblem on Different Platforms
Assess the emblem’s readability on mobile devices. If the graphic incorporates text, ensure it’s legible on screens smaller than 320px wide. Employ real device testing tools (BrowserStack, Sauce Labs) for accurate previews instead of relying solely on browser resizing.
Platform-Specific Considerations
Verify color accuracy across various browsers and operating systems. Colors can appear drastically different on macOS compared to Windows due to variations in color profiles. Calibrate your monitor and use a color management system for consistent outputs. For social media, pre-test on platforms like Instagram, Facebook, and Twitter. Different platforms have varying compression algorithms that can affect clarity. Aim for a high-resolution version during upload and monitor the displayed outcome.
Examine how the graphic scales at different sizes. A culinary establishment’s emblem must appear sharp and recognizable whether it’s on a business card (approximately 3.5 x 2 inches) or a large storefront sign. Test by printing the emblem at various sizes to detect pixelation or distortion. Consider creating multiple versions of your mark for diverse applications, such as a simplified version for favicons and a more detailed version for print collateral.
Accessibility Testing
Guarantee sufficient color contrast for users with visual impairments. Use online contrast checkers (WebAIM Contrast Checker) to ensure compliance with WCAG guidelines. Provide alternative text descriptions for all images on websites and digital media. This aids users who rely on screen readers and improves SEO. Furthermore, audit the emblem’s suitability for individuals with color blindness. Simulation tools (Coblis Color Blindness Simulator) can help visualize how the visual mark is perceived by individuals with deuteranopia, protanopia, or tritanopia.
Employ A/B testing, if possible, on your website to determine which version of the graphic (if multiple exist) performs best with your target audience. Track metrics such as click-through rates, bounce rates, and conversion rates to gather data-driven insights. Remember to test variations in the placement of your visual element on different pages and observe user behavior.
Q&A:
My food blog focuses on quick and easy weeknight meals for busy families. Should my logo visually represent this aspect of my brand, or is it better to just have something generic and clean?
It’s advantageous to tailor your logo to reflect your specific niche. Since you concentrate on quick and easy meals for busy families, consider incorporating elements that suggest speed and convenience. This could be a stylized clock integrated into a food image, simplified line art of common weeknight ingredients, or a font that communicates energy and accessibility. A generic logo might not effectively communicate the core value proposition of your blog and attract your target audience as readily as a more targeted design.
I’m not a designer, and I have a very limited budget. Are there any affordable alternatives to hiring a professional to create my recipe logo?
Yes, several affordable alternatives exist. Logo maker tools with pre-designed templates and customizable elements are available online. These often offer free or low-cost options. Additionally, you can explore freelance platforms where you can find designers offering logo creation services at varying price points. Be sure to check their portfolios and read reviews before committing to a designer to ensure they align with your style preferences and budget. DIY design tools, while requiring a time investment to learn, can also produce satisfactory results if you’re willing to learn the basics of design principles.
I’m starting a baking blog specializing in gluten-free desserts. What kind of visual elements or color palettes might be appropriate for my logo?
For a gluten-free baking blog, your logo should evoke feelings of health, indulgence, and trustworthiness. Visually, consider using imagery associated with nature, such as wheat stalks (without depicting gluten grains, perhaps stylized abstractly), leaves, or berries. Colors should be appetizing but also suggest a healthy, natural approach. A palette of soft greens, warm yellows, light browns, and creams could work well. Avoid overly bright or artificial colors, which might contradict the “gluten-free” message. Also, the font should be legible and approachable, perhaps something slightly elegant to reflect the special nature of desserts.
How important is it to test my logo on different backgrounds and sizes before finalizing it? I’m worried it will look great on my website but terrible on social media or printed materials.
Thorough testing is extremely useful. Your logo will appear in many contexts, from website headers and social media profiles to business cards and product packaging. It’s vital to ensure it remains legible and visually appealing regardless of background color or size. Create mockups of your logo on various platforms and at various resolutions to identify any potential issues with legibility, color contrast, or overall impact. Pay particular attention to how it renders at smaller sizes, as some intricate details may become lost or blurred. A versatile logo should work across all applications.
My recipe brand is called “Spicy Sensations.” Should I directly include chilli peppers or flames in my logo, or is that too on-the-nose?
While directly representing “spicy” with chilli peppers or flames might seem obvious, it can be done tastefully and creatively. The key is avoiding clichés. Instead of a literal drawing of a chilli pepper, consider using abstract shapes or patterns that suggest heat and intensity. Another approach would be to use a color palette that evokes spiciness, such as reds, oranges, and yellows. Alternatively, explore metaphorical representations of “sensation,” such as abstract swirling forms. If you do include a chili pepper, consider a stylized or simplified version rather than a realistic depiction. The goal is to communicate the brand’s essence without being overly literal or resorting to overused imagery.
My bakery specializes in sourdough bread. Should my logo directly feature bread, or are there more subtle ways to represent that?
While directly featuring sourdough in your logo is an option, and might be appropriate if that’s *all* you do, consider more indirect approaches if you plan to expand your offerings. A wheat stalk, a simple loaf shape (not too detailed), or a stylized representation of a baker’s peel could work well. You can also use colors associated with baking, like warm browns, golds, or creams, to subtly convey the feeling of freshly baked bread. Think about the overall feeling you want to evoke – rustic, modern, artisanal – and let that guide your design choices. A good exercise is to look at logos of *other* bakeries and see what works (or doesn’t) for you. Don’t copy, but gain inspiration!
I’m starting a food blog. I’m on a tight budget. Do I absolutely *need* to hire a designer for a logo, or are there decent DIY options?
While a professional designer can bring expertise and unique creativity, DIY logo creation is definitely a viable option for food bloggers on a budget. There are many user-friendly online logo makers available. Look for one that offers customizable templates and a library of food-related icons. Carefully consider your color palette, font choices, and overall message. Aim for something simple, memorable, and easily recognizable, *especially* when scaled down for social media. A less expensive (but not free) path is to hire a junior designer on freelance platforms. You often get a much better result than DIY at a manageable cost. Just be sure to check their portfolio and give very clear instructions.